As an Amazon Associate, I may earn a commission from qualifying purchases. Please note that you are never charged any extra for that.
Turmeric is a vibrant, golden spice. It’s used in many dishes worldwide.
Growing turmeric at home is both rewarding and simple. Turmeric, a member of the ginger family, thrives in warm climates. It’s known for its medicinal properties and flavor. You can grow it in pots or directly in the garden. With the right care, you can harvest fresh turmeric in about 8-10 months.
This guide will walk you through the steps to grow your own turmeric. Whether you’re an experienced gardener or a beginner, these tips will help you succeed. Ready to get your hands dirty? Let’s dive into the world of turmeric cultivation.
Table of Contents
Introduction To Turmeric
Turmeric is a vibrant, golden-yellow spice that has been used for centuries. It’s a staple in many cuisines, especially in South Asia. Growing turmeric at home can be both rewarding and beneficial.
Benefits Of Growing Turmeric
Growing turmeric at home offers numerous advantages. Let’s explore some key benefits:
- Health benefits: Turmeric is known for its anti-inflammatory and antioxidant properties.
- Cost-effective: Homegrown turmeric can save money compared to store-bought options.
- Freshness: You can enjoy the freshest turmeric, free from preservatives.
- Control over growth: You can ensure the turmeric is grown without pesticides.
- Sustainability: Growing your own turmeric reduces carbon footprint.
Uses Of Turmeric
Turmeric is a versatile spice with many uses:
- Culinary uses: Turmeric is a key ingredient in many dishes, adding flavor and color.
- Medicinal uses: It is used in traditional medicine for its healing properties.
- Cosmetic uses: Turmeric is often used in skincare products for its brightening effects.
- Household uses: It can be used as a natural dye for fabrics.
With its wide range of benefits and uses, growing turmeric at home can be a great addition to your garden.
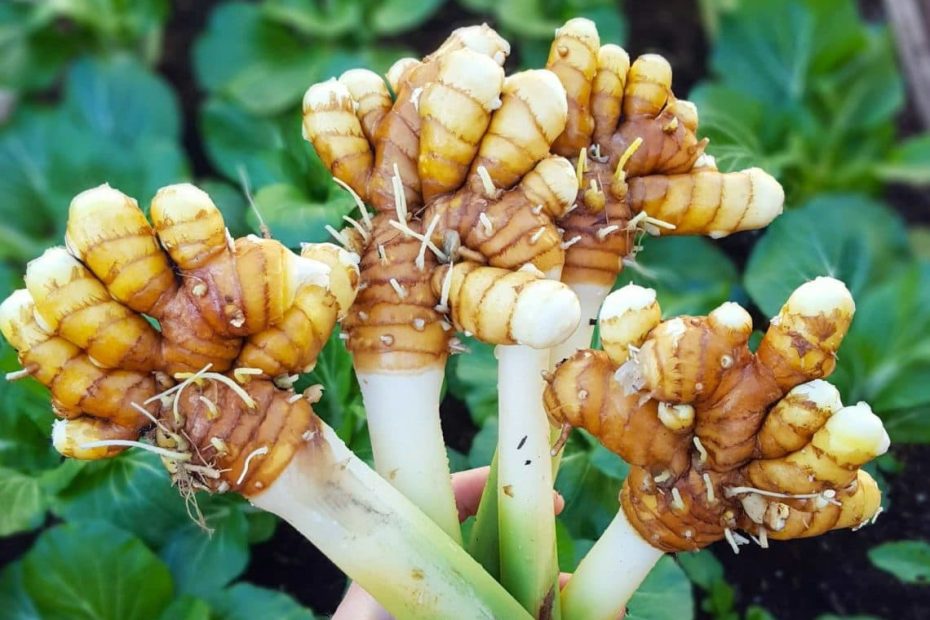
Credit: thegourmanticgarden.com
Choosing The Right Location
Growing turmeric successfully begins with choosing the right location. The location impacts the plant’s health and yield. Consider climate and soil requirements for optimal growth.
Ideal Climate
Turmeric thrives in a warm and humid climate. It prefers temperatures between 68°F to 95°F (20°C to 35°C). The plant needs a frost-free environment. Ensure the area receives at least 10 months of warm weather annually. Turmeric requires a moderate to high amount of rainfall. Aim for 40 to 60 inches (1000 to 1500 mm) per year.
Soil Requirements
The right soil is crucial for turmeric growth. Turmeric prefers well-draining, fertile soil. The soil should be rich in organic matter. A pH level between 4.5 and 7.5 is ideal. Avoid waterlogged areas to prevent root rot. Consider adding compost or aged manure to improve soil quality.
| Soil Aspect | Requirement |
|---|---|
| Drainage | Well-draining |
| Fertility | Rich in organic matter |
| pH Level | 4.5 to 7.5 |
Use raised beds or containers if soil conditions are not ideal. This ensures better control over soil quality and drainage. Regularly test the soil to maintain optimal conditions for turmeric growth.
Preparing The Soil
Growing turmeric at home starts with preparing the soil properly. Healthy soil ensures your plants get the right nutrients. This step is crucial for a rich harvest. Below are the essential steps for preparing the soil.
Soil Testing
First, you need to test your soil. Knowing your soil’s pH level and nutrient content is vital. Turmeric thrives in slightly acidic to neutral soil. Aim for a pH between 5.5 and 7.0.
- Use a soil testing kit from a garden store.
- Follow the instructions on the kit for accurate results.
- Record the pH level and nutrient content.
Soil Amendments
After testing, you may need to amend the soil. Soil amendments improve soil quality and ensure the best growth conditions for turmeric.
| Amendment | Purpose | Instructions |
|---|---|---|
| Compost | Increases organic matter | Mix 2-3 inches into the topsoil |
| Sulfur | Lowers pH | Add 1-2 pounds per 100 sq ft |
| Limestone | Raises pH | Add 4-5 pounds per 100 sq ft |
| Bone Meal | Increases phosphorus | Add 10 pounds per 100 sq ft |
After adding amendments, mix them well into the soil. Use a tiller or a garden fork for best results. Ensure the soil is loose and well-drained. Avoid compacted soil, as turmeric roots need room to grow.
Planting Turmeric
Turmeric is a tropical plant with many health benefits. Growing turmeric at home is rewarding. You’ll enjoy fresh turmeric rhizomes for cooking and health uses. Follow these steps to plant turmeric successfully.
Selecting Rhizomes
Start with fresh, healthy turmeric rhizomes. You can buy them from a garden center or online. Choose rhizomes with small nodules or buds. These will grow into new plants.
Avoid rhizomes that look dry or shriveled. They may not sprout well. If possible, get organic rhizomes. They are free from chemicals.
Planting Techniques
Plant turmeric in the spring after the last frost. Turmeric needs warm soil to grow. Select a spot with partial shade. Full sun can scorch the leaves.
Prepare the soil by adding compost. This enriches the soil and helps retain moisture. Plant the rhizomes 2 inches deep with the buds facing up. Space them 12 inches apart. Water the soil gently after planting.
Keep the soil moist but not waterlogged. Turmeric needs regular watering. Mulch around the plants to help retain moisture. This also keeps weeds away.
In a few weeks, you’ll see green shoots. Turmeric takes about 8 to 10 months to mature. Harvest when the leaves turn yellow and start to dry.
Watering And Fertilizing
Turmeric plants need consistent watering to stay healthy and grow well. Fertilize them every month with a balanced fertilizer.
Growing turmeric successfully requires careful attention to watering and fertilizing. These steps ensure the plants remain healthy and produce a good yield. Let’s dive into the specifics.
Watering Schedule
Watering turmeric is crucial for its growth. Turmeric needs a consistent moisture level. Avoid waterlogging, as this can cause root rot. Water the plants lightly but regularly. Monitor the soil to ensure it stays moist but not soggy. During dry spells, increase watering frequency.
Fertilizer Types
Fertilizing turmeric helps boost its growth and health. Organic fertilizers are ideal for turmeric. Compost or well-rotted manure works well. These provide essential nutrients without chemicals. Apply the fertilizer every two months. Use a balanced mix containing nitrogen, phosphorus, and potassium. This ensures the turmeric plants receive a well-rounded nutrient supply.
“`

Credit: www.youtube.com
Pest And Disease Management
Effective pest and disease management is crucial for growing healthy turmeric plants. Turmeric, like many crops, is susceptible to various pests and diseases. Understanding these threats and implementing preventative measures can help ensure a bountiful harvest.
Common Pests
Several pests can affect turmeric plants. Here are the most common ones:
- Rhizome Fly: This pest lays eggs on turmeric rhizomes. The larvae feed on them, causing rot.
- Shoot Borer: The larvae bore into stems and shoots, leading to wilting and stunted growth.
- Leaf Roller: This pest rolls up the leaves and feeds inside, damaging the foliage.
- Scale Insects: These insects suck sap from the plant, weakening it and reducing yield.
Preventative Measures
Implementing preventative measures can minimize pest damage. Here are some strategies:
- Crop Rotation: Practice rotating turmeric with non-host crops. This helps break pest life cycles.
- Proper Spacing: Ensure adequate spacing between plants. This improves air circulation and reduces pest infestations.
- Use of Natural Predators: Introduce beneficial insects like ladybugs. They help control pest populations naturally.
- Regular Monitoring: Inspect plants regularly for signs of pests. Early detection allows for timely intervention.
- Organic Sprays: Use neem oil or insecticidal soap. These organic options are effective against many pests.
By following these preventative measures, you can significantly reduce the risk of pest infestations in your turmeric crop. Keep your plants healthy and thriving with these simple yet effective strategies.
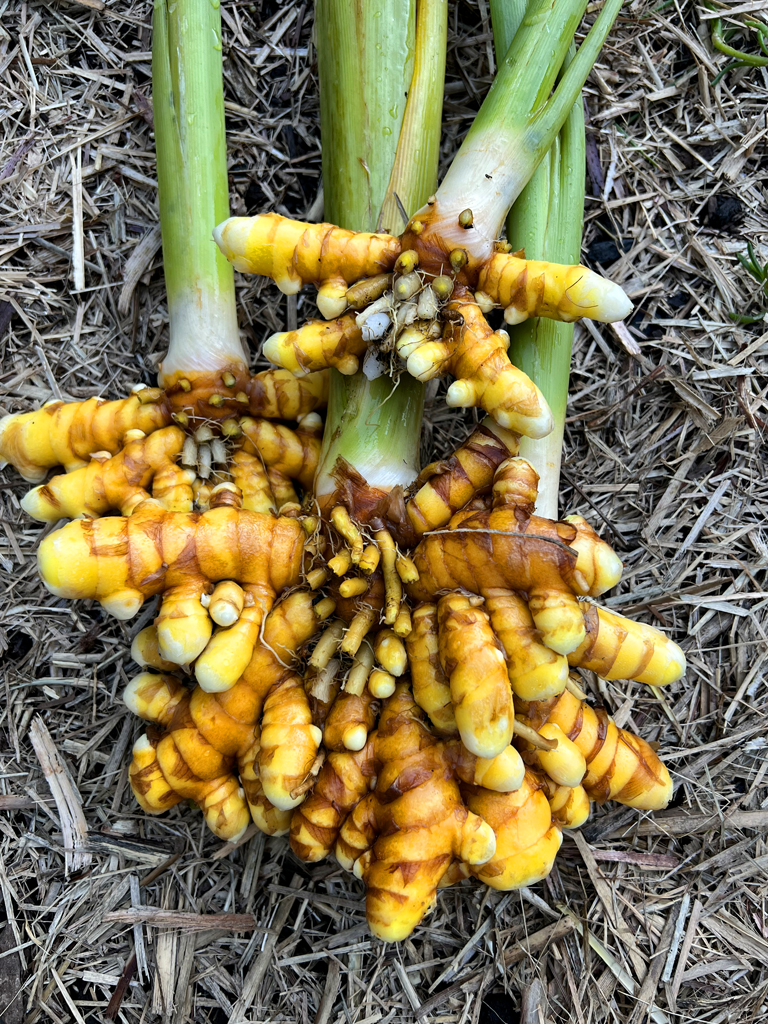
Harvesting Turmeric
Harvesting turmeric is a crucial part of ensuring you get the best quality from your plants. This stage requires attention and care to preserve the health benefits and flavor of turmeric. Let’s dive into the details of when and how to harvest turmeric.
When To Harvest
Turmeric is ready for harvest 8-10 months after planting. The leaves will start to yellow and dry up. This is a sign that the rhizomes are mature.
For the best quality, harvest before the first frost. Frost can damage the rhizomes. Harvesting at the right time ensures the rhizomes are full of nutrients and flavor.
Harvesting Methods
There are several methods to harvest turmeric, each with its own benefits. Here’s a step-by-step guide to some common methods:
- Digging by Hand: Use a small spade or garden fork. Carefully loosen the soil around the plant. Gently lift the rhizomes out of the ground.
- Using a Garden Fork: Insert the fork about 6 inches from the plant base. Apply gentle pressure and lift the plant. Shake off the soil to reveal the rhizomes.
- Mechanical Harvesting: For larger plantations, mechanical harvesters can be used. These machines dig and lift the rhizomes, making the process faster.
After harvesting, wash the rhizomes thoroughly to remove soil. Then, cure them by laying them out in the sun for 2-3 days. This process enhances the flavor and extends the shelf life of the turmeric.

Credit: practicalselfreliance.com
Storing And Using Turmeric
Storing and using turmeric properly ensures you enjoy its benefits year-round. Freshly harvested turmeric requires careful storage to maintain its potency and flavor. Additionally, knowing how to use turmeric in various recipes can add a healthy twist to your meals.
Storage Tips
Store fresh turmeric in an airtight container. Keep it in the refrigerator for up to two weeks. You can also freeze turmeric for longer storage. Peel and slice the turmeric before freezing. Lay the slices flat in a single layer on a baking sheet. Once frozen, transfer them to a freezer-safe bag.
Dried turmeric has a longer shelf life. Store it in a cool, dark place. Use an airtight container to keep out moisture. Ground turmeric can last up to a year with proper storage.
Turmeric Recipes
Turmeric adds flavor and color to many dishes. Make a simple turmeric tea by boiling water with fresh or powdered turmeric. Add honey and lemon for taste.
Use turmeric in soups and stews for a warm, earthy flavor. Try adding it to rice dishes for a vibrant yellow color. Turmeric also pairs well with roasted vegetables. Sprinkle a little turmeric on them before baking.
Turmeric milk, also known as golden milk, is a popular drink. Mix warm milk with turmeric, honey, and a pinch of black pepper. This drink is both soothing and nutritious.
Experiment with turmeric in your favorite recipes. Its unique taste can enhance many dishes. Enjoy the health benefits of this golden spice.
Troubleshooting Common Issues
Growing turmeric can be rewarding, but it comes with its challenges. Understanding common issues will help you keep your plants healthy. Let’s explore some problems you may encounter and how to fix them.
Yellowing Leaves
Yellowing leaves in turmeric plants can signal several problems. Overwatering is a common cause. Ensure your soil has good drainage. Water only when the top inch of soil is dry. Another reason could be nutrient deficiencies. Turmeric needs rich soil. Use organic compost to enrich the soil. Check for pests like aphids or spider mites. These pests can cause leaves to yellow. Use neem oil or insecticidal soap to treat infestations.
Poor Growth
Poor growth in turmeric plants often results from inadequate sunlight. Turmeric needs at least 6 hours of sunlight daily. Plant turmeric in a sunny spot for better growth. Low soil fertility can also lead to poor growth. Make sure your soil is fertile and well-drained. Use compost or organic fertilizer to enrich the soil. Another reason might be improper spacing. Turmeric rhizomes need space to grow. Plant them 12 inches apart to allow for healthy growth.
Frequently Asked Questions
How Long Does It Take To Grow Turmeric?
Turmeric takes about 7 to 10 months to fully mature. The plant is ready for harvest when the leaves start turning brown.
What Is The Best Soil For Turmeric?
Turmeric grows best in well-drained, fertile, and loamy soil. It prefers a pH level of 4. 5 to 7. 5.
How Much Water Does Turmeric Need?
Turmeric needs regular watering, especially during dry periods. Keep the soil consistently moist but not waterlogged.
Can I Grow Turmeric Indoors?
Yes, turmeric can be grown indoors in containers. Ensure it gets plenty of light and warmth.
Conclusion
Growing turmeric is simple and rewarding. Follow the steps, and enjoy fresh turmeric. Start with quality rhizomes, plant in well-draining soil. Water regularly, but don’t overdo it. Ensure your plant gets enough sunlight. Keep an eye out for pests and diseases.
Harvest turmeric after 7-10 months. Store it properly for future use. Turmeric can enhance your cooking and health. Try growing turmeric today. Happy gardening!